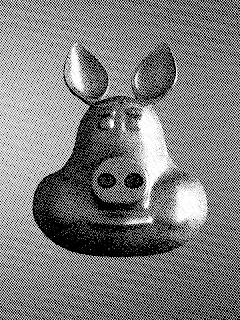
The other day I was reading about old printing techniques and I wanted to create the look and feel of screen printing with half tones and screen tones or even recreate a wood block printed look.
The approach I came up with and want to share here is pretty simple and versatile and completely implemented in compositor nodes and in the section below I show the necessary node setup. Although done in the compositor I dearly missed the possibility to create OSL nodes in the compositor because it would be nice to have some more textures to choose from.
Node setup
The general idea is to take a black and white version of your rendered image and combine it with some pattern. If that pattern is a smoothly varying grey scale image then it is possible compare that pattern against the b&w image and produce just black and white pixels but more of each will be produced at darker and lighter areas respectively. If that sounds confusing, bear with me it will get clearer in a minute.

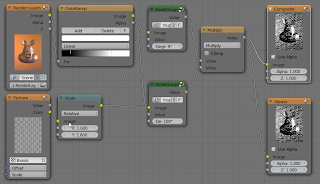
The image at the start of the article was created with the node setup shown above. The image was renderered in Cycles but composited in Blender internal to be able to use textures in the compositor. This a bit awkward but not all that difficult: just set up your scene in cycles and if it renders ok, switch to bkender internal, add a new material to an arbitrary object (but don't assign it to any actual geometry) and then add a wood texture. This wood texture will give us paralel lines we can use in the compositor even though it is not actually used in any material. If you enable compositing in the post processing panel and press F12 to render, the scene will render in Cycles even though the render engine us set to internal.
In the noodle above we convert the image to black and white by plugging it into a value socket. This happens to be a colorramp node which allows use to tweak the contrast etc. The texture node refers to the wood texture we created earlier. This texture is also scaled so it will give us the line spacing we want. The real work is done in the two group nodes. These take the image and our texture, rotate the texture and do the comparison. Multiplying two versions with the lines at 90 degrees to each other give us the point pattern in the opening image.

The node group not only rotates the texture but compares it to the image. We do not simply compare whether the black & white value of the image is larger tgan that of the texture because this would give rise to horrible aliasing effects. Therefore the light orange nodes implement a smoothstep() whose smoothness is controlled by the red value node (More on this here).
Variations
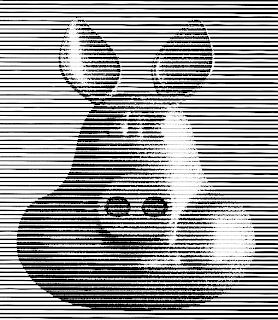
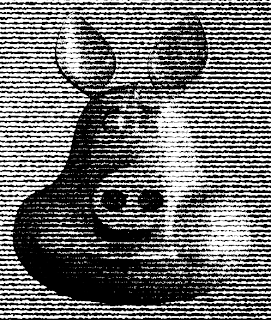
Of course, in stead of multiplying two perpendicular sets if regular lines you could use any suitable pattern. The first image uses a single pattern of horizontal lines and the second image uses a marble pattern to create a wood block like appearance.

Even though you cannot uze OSL in the compositor I think it would be possible to setup two scenes in cycles, one with your image and one with just an OSL. pattern on a plane and combine these in the ckmpositor.

If you would like to know more about programming OSL you might be interested in my book "Open Shading Language for Blender". More on the availability of this book and a sample can be found on this page.
No comments:
Post a Comment