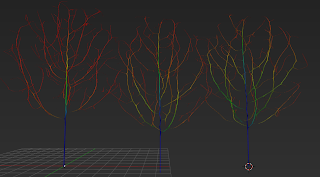
It has been a while since I worked on the new tree addon so I thought some attention was due.
Over the last six months or so my thoughts did keep coming back to the speed of the space tree addon. We already got quite some speedup from introducing kd-trees to store the branchpoints but still it felt kinda slow.
A time complexity analysis is difficult because the number of branch segments grows while the number of endpoints either falls (when branches come within kill distance) or rises (when they are added at random while generating new branch segments) but what was clear that we calculated all branchpoint/endpoint interactions for each iteration anew. And with the number of branchpoints easily rising to hundreds if not thousands and the number of endpoints initialy amounting to several hundreds this adds up quickly, especially because calculating a branchpoint/endpoint interaction is computationally expensive.
This new version takes care to recalculate such interactions only when necessary: when adding or removing an endpoint it recalculates things only for the branchpoint to which it is closest and when adding a branchpoint it checks which if any of the endpoints is now closest to this new branchpoint and does the necessary calculations only for those endpoints.
The resulting speedup is tremendous: A moderately sized tree with the settings shown below takes 76 seconds to generate the branch skeleton on my machine, while in the new version it takes just 0.6 seconds! These two order of magnitude mean that I am tempted to remove the update button and return to truly interactive modelling, however, skinning such a tree takes still considerable time: almost 5 seconds with Blenders skin modifier, way too slow for interactive modelling (I didn't yet compare my own skinning method).
| Parameter | Value |
|---|
| max. iterations | 2000 |
| no. of endpoints | 500 |
| internode length | 0.35 |
| kill distance | 0.51 |
Code availability
I have not commited this new version to the addons-contrib repository yet because I want to test it some more (the changes in the code are quite big) and because I discovered a bug in Blenders skin modifier that this addon can trigger (edit: wow, that is fast, fixed almost immediately!). Nevertheless, this version is available for the adventurous on GitHub, just make sure you read the installation instruction posted there (important if you use a Blender daily build because then the old version of the addon comes bundled and needs to be removed).
Roadmap
A roadmap might not be the correct term as it implies some form of commitment I cannot possible pledge to a hobby project but nevertheless i'd like to present a list of things I have in mind for the spacetree addon.
None of those items might see the light of day and the order in which I might tackle them is not certain at all but it might give end users some indication of thr direction I'd like to take the addon. It also functions as a worklist that I can use for myself to tick items off.
- [done] correct radius (and positioning) for native skinning
- interactive/manual update switching based on elapsed time
- twigs
final extra branchpoints not controlled by endpoints - [done] implement 'influence' option
restrict the range within endpoints can exert their influence - branch angle control
- better leaves
- [done]better geometry (a small group of low poly leaves)
- [done]vertex group w. weights based on connectivity (or its reverse, tips have more leaves)
- [done]a default particle system (as an alternative to placing leave objects)
- [wip]some default leaf shapes (alpha masked textures, freely distributable, so I'll need to make my own once it is springtime again)
- [done] experiment with blended box mapping material for branches, include seamless bark texture). Blended box mapping didn't work out that well but a material based on a normalxtangent based coordinate system works quite well (see BlenerArtists thread). Code and library are in place, but with a placeholder material for now.
- [wip] apical control
control the suppression of side shoots lower down branches. (I have a rudimentary implemenation in place but it's not quite what I want yet) - branch shedding
control automatic pruning of branches that receive little light - endpoint distribution based on rudimentary mesh
distribute endpoints within some radius around the edges of a mesh to 'draw' a basic shape of a tree - better display of timings
- [done]uv subdivision
