Add-ons and more

Face area to vertex color add-on, can we improve wireframe renders?

CGMatter showed in a video how to create a wireframe shader that, unlike the cycles wireframe node,  does not look at the triangulated mesh but at the original faces.

The problem

His node setup works with an uv-layer that contains a default uv mapping (one that you can get with uv unwrap -->reset and then basically calculating the distance to the edge of the uv square.
This works but it is not quite the same as the cycles wire-frame node. As some commenters pointed out, the line thickness is a fraction of the uv square so will yield thicker lines for larger faces.

The solution?

We could correct this if we had the face area available, but this is not an attribute we can access directly using nodes.
So i came up with a small add-on that stores the face area in a vertex color layer, scaled to the largest face, so the largest face will get an rgb value of (1.0, 1.0, 1.0)
If we have such a vertex color available we can simply divide the width of the original wire-frame shader by the square root of this value (because the fraction of the uv coordinate actually scales with the length of a side). The result now looks more even for large and small quads.

Limitations

For meshes with fairly regular quads this is acceptable, however, for less regular quads this calculation might give unwanted variation, especially for thicker lines (note the quads on the edges of Suzanne's ears):

For non-quads the solution doesn't work at all because some side will not align with the principal directions of the uv-map.
So I don't think this is a solution at all, but making a face area available as vertex colors might have its use in other scenarios so it is available for download.

Download

The add-on can be downloaded from my GitHub repository. After installation it will be available in the Paint menu when in vertex paint mode. Simply select it and the active vertex color layer will be filled with grey values that represent the face area.
A .blend file with a node setup is available as well.

The wireframe node group contains an extra input that if set to a value slightly larger than zero will apply an additional perspective so that lines won't shrink with distance from the camera.

Waste bin

Another model I put on my Blendermarket shop a couple of weeks ago:


Blender procedural hexagon pattern

I needed a texture for a hexagonal pattern that was fully procedural. In the past I wrote one in Open Shading Language but I wanted one that utilized the GPU and worked for Eevee as well. So I implemented a node group that uses basic nodes only. An example is shown below.


The node group is straight forward to use and has options to change the scale and the width of the line. An usage example is shown in this noodle:


Availability


It is available for download from my GitHub repository. To append the node group so that you can use it in your material, simply select File -> Append ..., browse to the .blend file you downloaded and locate the Hex Nodegroup. After that you can use it in the Shader editor with Node -> Group -> Hex

Implementation details


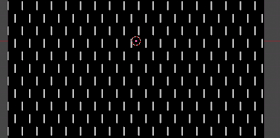
The Hex nodegroup simply overlays three 60° rotated copies of a pattern of dashed stripes


Each dash is the side of a hexagon. The stripes are created with another node group shown below (click to enlarge)


It contains two almost identical frames: one to produce a set of vertical dashes and another one to create a simlar set but offset in the x and y direction. The dashes are generated each time from a wave texture in the x direction that is combined with a greater than node to produce narrow vertical lines. From this we subtract broader horizontal lines generated in the same fashion to create the gaps between the dashes.

Basket arch add-on updated to 2.83

A long time ago I wrote a small add-on to create a basket arch (a.k.a. three centered arch) in Blender.

There is now an updated version available in my GitHub repo that will run on Blender 2.83.

The user interface is slightly different (no more object layers) but the generated arch is the same.