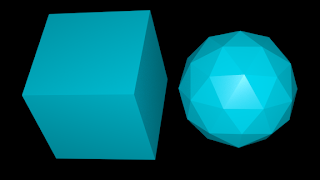
Sample scene, just a cube and an icosphere with sharp edges and some glossy material.
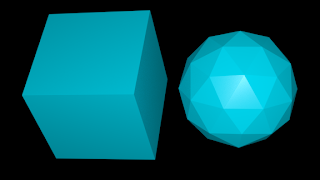
The effect of the bevel shader with
Perturb = 0.1. Subtle but clearly noticable.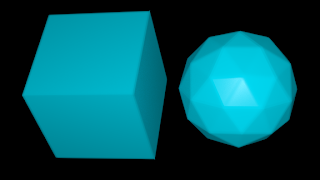
Setting
Perturb = 1.0 is far less subtle but shows how much roundedness is possible. All images were produced with Divisions = 3, i.e. 27 sample rays (see below). Code & theory
To simulate rounded edges choose a point a little below the surface and from this point we cast a set of rays that are all a little bit perturbed from the normal. The we determin the normal at these new intersections and average all normals found. This way when we are close to an edge the normals at the intersection with an adjacent face will be blended in. The illustration below shows what I mean: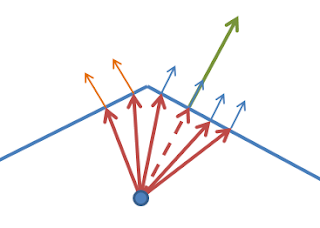
At the shaded point we have a green surface normal. We descend below the surface along this normal (dashed red line) to the blue point. From this point we shoot rays (red) that are slightly perterbed from the normal. Some will hit the same face (and have the same normal as the shaded point (small blue arrows) some will hit the adjacent face with adifferent normal (small orange arraws). The calculated normal is the average of the normals at the hit points.
Note that this algorithm only works well for convex edges, because with concave edges random faces could be hit instead of the adjacent face if the angle between the faces is too sharp.
The code implementing this algorithm is pretty short:
#define BIG 1e6

shader edge(
  float Delta = 0.01,
  float Perturb = 0.001,
  int Divisions = 2,
  output float Fac = 0,
  output normal Normal = N
){
  vector origin = P-Delta*N;
  float count = 1;
  for(int x=0; x < Divisions; x++){
    for(int y=0; y < Divisions; y++){
      for(int z=0; z < Divisions; z++){
        vector d = noise("perlin",vector(x+0.1,y+0.1,z+0.1));
        vector np = N + Perturb * d;
        if(trace(origin, np)){
            float hdb = 0;
            normal nb = 0;
            getmessage("trace","hitdist",hdb);
            // versions before 2.69.11 4-Mar-2014 crash on next statement
            getmessage("trace","N",nb);
            Normal -= nb;
            count += 1.0;
        }
      }
    }
  }
  Normal = normalize(Normal/count);
  Fac = count/(1+Divisions * Divisions * Divisions);
}
We choose an origin point a bit below the surface by descending along the normal [line 10], generate perturbed normals [line 15-16], trace these normals [line 16] and if we have a hit we retrieve the normal at the hit point [line 22]. Because we are below the surface/ inside the mesh this normal will point inward so we subtract it from our sum of normals (Normal). Finally we divide the sum of normals by the number of hits [line 30]. Note that we also get the hit distance [line 20] but don't use that value. We could check this againt some limit to reduce artifacts on concave meshes for instance.The generation of perturbed normals is rather awful: just perturbing it by Perlin noise does not give a very uniform distribution of directions, some Halton or Sobel sequence would probably be better but this will do for now. Also not we add a small value too our noise sampling points to avoid the zeo knots in the Perlin noise.
Also note that I got crashes with Blender's daily build version before March 4 (win-64 version) when using the
getmessage() function. This appears to be fixed in the latest builds but be aware.Example node setup
Note that the node does not take a position or normal as input, it gets those from the globalP and N respectively but of course if necessary this can be changed quite easily. The setup shown below is the exact setup used for the example images at the start of the page.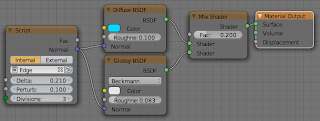
If you would like to know more about programming OSL you might be interested in my book "Open Shading Language for Blender". More on the availability of this book and a sample can be found on this page.
No comments:
Post a Comment