Blender: transparent particles vs geometry

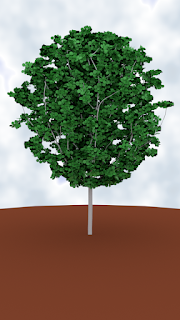
Rendering scenes with lots of particles can be quite expensive. I render trees quite often and these trees typically have their leaves implemented as a particle system with thousands (or several tens of thousands) particles.

When creating particles that resemble leaves or twigs you basically have two options. The most common one is to take a photo-realistic texture with an alpha channel and use this on a simple uv-mapped rectangle. Another approach is to model the leave or twig, with as little geometry as necessary, and use that as a particle. The uv-mapped texture could still be used but no alpha channel is used. The results can be almost indistinguishable:
 

(transparent texture on the left, real geometry on the right.)

Now the big question is, what is faster? Or to be more precise, what renders faster? (Because modeling a leaf or twig takes some time too, even is it is just a flat contour).

Short answer: using real geometry can save you about 20% or more render time compared to using transparency!

The setup

We used the Cycles renderer on Blender 2.79 throughout on a midrange system (4core/8thread i7 @ 4Ghz, 16GB ram, NVidia GTX 970).

We used trees with identical particle systems except for the actual particle objects. The particle objects were either a simple uv-mapped square or a very simple mesh. We made two variants: a simple circle and a collection of three circles. These two variants enable us two look into the effect of different transparent fractions (the one with the full circle is 4 - π r² ≅ 21% transparent, the one with the small circles is 4 - 3 *(  π r²/4) ≅ 41% transparent)


The transparent meshes are 1 quad each (2 triangles) while the real meshes are 12 and 36 tris respectively.
The materials were simple:
 
(Note that we still use an image texture for the geometry node for the color, but we ignore the alpha information)

The results

For all four variants we used identical trees with 2634, 6294 and 12252 particles and rendered them on the GPU with 32 samples and 8 transparent bounces:

That is a significant difference, almost 50%! The difference when rendering on a CPU is less but still pronounced:
Still up to 20% to gain!

The slope of all the lines is fairly gentle: doubling the number of particles certainly doesn't increase the render time, and this can be explained when you realize that more and more particles will be obscured by others so no rays will be wasted on them. The surprising bit is that there is (almost) no divergence between the large and small leaves, even though the small ones will let pass double the amount of rays. Maybe in a less dense setup this would happen, but here it seems insignificant.

Now the number of transparent bounces is a significant factor here. We left it at the default of 8. For transparent renders we really do need these bounces otherwise leaves that are obscured by other ones will not be visible through the transparent part if a ray traverses deep enough into the tree:
 
(1 bounce on the left, 16 transparent bounces on the right. Note the lack of see-through spots and general darkening for the one with very few transparent bounces)
Now when we render with real geometry the number of transparent bounces makes no difference:
For transparent geometry it matters a lot and we need at least 8 and maybe more bounces if we render dense particle collections like tree crowns. The image above is for GPU, the graph for CPU is similar in the sense that at 4 transparent bounces or more the mesh particles are significantly faster but at a lower number the picture is a bit muddled:


Conclusion

Whether rendering on CPU or GPU it looks like creating simple geometry to model the outline of particles is preferable to using alpha mapped textures. Your mileage may vary of course (my Blender 2.79 on an Intel i7-4790K @ 4.00GHz / NVidia GTX 970 combo might behave differently than your setup), but I expect the general trend to be the same.

Limitation of true displacement in Blender

I am pretty sure this counts as a limitation and not as a bug of true displacement in Blender, but if normals are not smoothed in some way the displacements may cause gaps in the mesh:


The image shows two identical meshes (created with Shift D) with the same material applied. This material uses true displacement and both objects have a simple adaptive subdivision modifier.
The one on the left has all faces flat shaded while the one on the right has all faces smooth.
The gaps are obvious.

Apparently this is caused by having normals across the the edges of adjacent faces that point in different directions as displacement is along the normals. With smooth faces the calculated normals blend into each other, which will cause displacement near an edge to go in the same direction.

The same smoothing effect can be achieved by changing the adaptive subdivision modifier from simple to catmull-clark.  (catmull-clark effectively interpolates the normals before subdividing)

Again, I don't think this counts as a bug, but it is good to know if just to prevent some head scratching.

Nodeset: better heightmap adjustment

NodeSet is now also available in a Pro version. Read all about it in this article or check out my BlenderMarket shop if you are interested.

A new version of Nodeset is available that adds a subtract node if you use the option to link a heightmap to the displacement output.
The reason is that most often the values in a heightmap are between 0 and 1, which will result in a bloated mesh unless you subtract 0.5 first.

Availability

The current version (201801031529) is available for download (right click and save as ...) from my GitHub repository.

Previous nodeset articles

I wrote several articles on this tiny add-on that you might want to read. They are (newest first):

free Blender model of a red maple

As something different from all the coding I'd like to present you a freebie model of a small red maple (Acer rubrum, wikipedia)

The tree was created with my Space Tree Pro add-on (available on Blender Market). It can be used as is or (if you have the Space Tree Pro add-on) tweaked to your liking.

The tree

The tree is a generated mesh object called Tree and has a particle emitter parented to it. So if you move it make sure you move the tree mesh and not just its particles (called LeafEmitter). The materials used for the leaves can be tweaked to give an even redder appearance if you like, but I chose to tone it down a bit towards slightly more late autummn orange/yellow.

The shape of the tree crown was modeled (roughly) on the 'Autumn Glory Maple' (Red maple, Acer Rubrum) (see e.g. https://goo.gl/images/DUAFw4 ) and the leaves were taken from a photographic reference (see below) and most likely from a north American red maple. The bark material is a simple procedural material.

If you render the scene be aware that the bark material uses the experimental micro displacement settings and is set to GPU. So depending on your system you might not see all surface detail in the trunk that you see in the sample rendering and micro displacement is heavy on RAM so you might need to use your CPU to render anyway.

Availability

The .blend file is available for download from GitHub (right click and save as ...). It is fairly large (76MB) because of the packed image files and because the tree mesh and the leaf particle system add up to about 240k tris. It is distributed under a CC BY-SA 4.0 license.

Additional credits

Even though these individuals provided material under a CC0 license, I really appreciate their efforts so I would like to point you to their respective web pages.

The environment HDR used in the scene is from HDRI Haven (https://hdrihaven.com/) by Greg Zaal. Specifically the low res version of the river walk. It was used without changes in this scene. Greg's HDRIs are free (CC0) but you can support his work on Patreon

The original leaf images are from Dustytoes on Pixabay They were also provided under a CC0 license and already isolated from the background. You might want to give her a thumbs up. I created 7 individual textures from the original and converted them to PBR texture maps using Substance Designer's Bitmap to material node.