Linefit add-on

As a companion add-on to PlaneFit I put together a small add-on that can add a single edge (two connected vertices) that best fits a collection of selected vertices.
After installtion it will be available in the 3d-view menu Add → Fit line to selected and the result of applying it to a vaguely cylindrical point cloud is shown below:

Availability

As usual the add-on is available from my GitHub repository (right-click on the link and Save As ...)

Extra information

There are many ways to fit a line to a collection of points but here we use the same eigen decomposition we use for fitting a plane. Instead of selecting the eigen vector with the smallest eigen value as the normal of a plane, we now select the eigen vector with the largest eigen value. This vector accounts for most of the variance in the positions of all the vertices, and is therefore the best fit. (There are other metrics we could use and this explanation is may be a bit too much hand-waiving for real mathematicians but it works :-)
The relevant code is shown below:
import numpy as np

def lineFit(points):
    ctr = points.mean(axis=0)
    x = points - ctr
    M = np.cov(x.T)
    eigenvalues,eigenvectors = np.linalg.eig(M)
    direction = eigenvectors[:,eigenvalues.argmax()]
    return ctr,direction

PlaneFit: Blender add-on, tiny improvement

The PlaneFit add-on wasn't very robust yet so I added a check for less than 3 selected vertices so a plane will only be fitted when it is sensible to do so. Gives a proper warning as well and the menu (In the 3d view, Add->Mesh in edit mode) now has a more readable label.

Availability

I have updated the add-on in my GitHub repository. (right-click on the link and select Save As .. to store the .py file somewhere where you can find it again )

PlaneFit: Blender add-on to fit a plane through a set of vertices

After all the updates to my BlenderMarket add-ons, it is time to spend some time on other add-ons again.

Fitting a plane

Fitting a plane through a collection of selected vertices might be useful in all sort of scenarios. Currently you can snap a plane to a face with Blender's snap tools but if we want to fit a plane to a large set of vertices, we need to resort to basic linear algebra to do this in a fast and robust manner. And because linear algebra is not everybody's favorite subject I created a small add-on.

After installation the add-on is available from the Add menu if you have a mesh in edit mode. Clicking on it will create a square plane that is fitted through all selected vertices. A size option lets you scale this new plane interactively. The result might look something like this:
Note that currently we not check if the minimum of 3 vertices are selected, you get a an error if you try.

Availability

As usual the add-on is available from my GitHub repository. (right-click on the link and select Save As .. to store the .py file somewhere where you can find it again )

Source code

Both the linear algebra and the code to add a plane to an exiting mesh isn't completely trivial, so let me highlight the interesting bits:

Fitting a plane

The fitting code is quite short and straight forward:
import numpy as np

def planeFit(points):
    ctr = points.mean(axis=0)
    x = points - ctr
    M = np.cov(x.T)
    eigenvalues,eigenvectors = np.linalg.eig(M)
    normal = eigenvectors[:,eigenvalues.argmin()]
    return ctr,normal
Any book on linear algebra can give you a better explanation but with a fair bit of hand-waving it can be explained as follows: points is a list of 3d-vectors. ctr will be the midpoint of the plane which is the mean of each of the x, y and z-components.

In line 5 - 7 we calculate the eigen vectors of the point cloud. It is a 3d cloud so we will get 3 eigen vectors and 3 corresponding eigenvalues. Each combination of eigen value and eigen vector can be interpreted as a direction vector and a measure of how well it explains the spread of the points. This means that if the points lie roughly in a plane, the two biggest eigen vectors lie in the best fit plane while the smallest one will be the normal (all eigen vectors are perpendicular). And indeed this smallest one is the one we get in line 8.

Adding a plane an existing mesh

Now adding a plane consisting of four vertices in a square would be quite simple, yes? Ehh, no: the Mesh object has a from_pydata() function but it only works correctly when adding to an initially empty mesh. So lines 15 - 27 essentially replicate what that function does: create 4 vertices, and 4 loops, compose a polygon out of it and add it to the mesh as well. We could have worked with a BMesh representation but then we would not have an efficient way to retrieve all vertex coordinates, something we really need when working with thousands of vertices.

The code in lines 7 - 12 is a very efficient way to get the coordinates of selected vertices into a Numpy array: we create Numpy arrays to hold all the vertex coordinates and the selected status, then get all of them with the fast built-in function foreach_get(). verts[selected] then leaves us with an array of just the coordinates of selected vertices, which we pass to our planeFit() function we saw earlier.

We then create two vectors perpendicular to our normal and use them to construct four vertex coordinates.

         def execute(self, context):
  bpy.ops.object.editmode_toggle()
  me = context.active_object.data
  count = len(me.vertices)
  if count > 0:  # degenerate mesh, but better safe than sorry
   shape = (count, 3)
   verts = np.empty(count*3, dtype=np.float32)
   selected = np.empty(count, dtype=np.bool)
   me.vertices.foreach_get('co', verts)
   me.vertices.foreach_get('select', selected)
   verts.shape = shape
   ctr, normal = planeFit(verts[selected])
   dx, dy = orthopoints(normal)  # definition of orthopoints() not shown
   # can't use mesh.from_pydata here because that won't let us ADD to a mesh
   me.vertices.add(4)
   me.vertices[count  ].co = ctr+dx*self.size
   me.vertices[count+1].co = ctr+dy*self.size
   me.vertices[count+2].co = ctr-dx*self.size
   me.vertices[count+3].co = ctr-dy*self.size
   lcount = len(me.loops)
   me.loops.add(4)
   pcount = len(me.polygons)
   me.polygons.add(1)
   me.polygons[pcount].loop_total = 4
   me.polygons[pcount].loop_start = lcount
   me.polygons[pcount].vertices = [count,count+1,count+2,count+3]
   me.update(calc_edges=True)

  bpy.ops.object.editmode_toggle()
  return {'FINISHED'}

IDMapper: December 2017 release available on Blender Market

I have released an updated version of the IDMapper add-on to Blender Market.

New features

It features some cosmetic changes but more importantly it hosts a ton of new features developed based on user feedback, including:
Baking
you can now directly bake a vertex color layer to an image without the cumbersome route of setting up materials, emission shaders and dummy images necessary in the regular way. Just 1-click and a couple of seconds later you'ĺl have you color id-map as an image in the UV-image editor
Vertex groups to vertex colors
there is now an option to assign unique vertex colors based on vertex group membership of vertices. This 1-click option lets you quickly convert vertex groups to vertex colors
Create materials based on vertex colors
this option creates a material for each unique vertex color and assigns the vertices with this color to the material.
Better color list management
If you use a predefined list of colors to use in id-maps across different models the color list lets you manage these colors. It is now possible to add items to this list for any vertex color nor yet present, simplifying the maintenance of those lists
And of course there are lots of smaller improvements too.

The new features are highlighted in this video:

This video is part of a small playlist with additional tutorials:

Availability

IDMapper is available in my Blender Market shop:
https://blendermarket.com/creators/varkenvarken

New version of WeightLifter introduces baking and animation

A new version of WeightLifter is available on BlenderMarket.

WeightLifter is an add-on that can calculate all sorts of information and store this into vertex groups or vertex color layers. It can for example determine the visibility of vertices for a certain camera or the distance to some light source and much more, information that can for example be used as a density map in particle systems.

New features

The newest version introduces some new modes like calculating a flow map or the mesh deformation but the most exiting new feature is the ability to bake any weight map for each frame in an animation. This way can quickly regenerate a vertex group for each frame while rendering, effectively animating a weight map, something which is not possible otherwise.

To illustrate how to do this, I have created a short video that shows the workflow for creating an animated density map that lets the proximity to a lamp drive the emission of particles.

Nodeset: tiny enhancement

NodeSet is now also available in a Pro version. Read all about it in this article or check out my BlenderMarket shop if you are interested.

A new version of nodeset is available that includes .jpg in the default list of extensions.

Availability

The current version (201712020811) is available for download (right click and save as ...) from my GitHub repository.

Previous nodeset articles

I wrote several articles on this tiny add-on that you might want to read. They are (newest first):

Blender Market Black Friday - Cyber Monday sale

Goods news for cost conscious Blenderheads: this thanksgiving weekend Blender Market will host the yearly Black Friday - Cyber Monday sale!


I will participate with my add-ons, including the popular IDMapper add-on. So if you want to save significantly on WeightLifter, SpaceTree, or IDMapper (video), head over to my shop on Blender Market this weekend. Of course many other creators will be participating as well so you might want to shop around a bit more :-)

[For Europeans: remember Blender Market runs on Chicago time, so don't start shopping too early next Friday :-) ]

Add-on: make vertex colors unique across selected objects

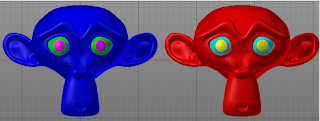
Say you have carefully assigned vertex colors to your mesh to be used as a color ID mask in a texturing program. And now you want two copies of this mesh and you want to assign different materials while using the same texture set for both objects to save on the number of textures. Assuming you have given each mesh a uv-mapping that covers a different set of uv-coordinates this shouldn't be an issue if you could make the vertex colors unique across this meshes.
This is where this add-on comes in handy: it will count the number of vertex colors used in all selected objects and reassign colors in such a way that all the colors are unique with the selected objects.
For example, starting with two meshes with identical color assignments


You will end up with something like this:


Note that none of the colors used in the left mesh appear in the right mesh and vice versa.

Availability

As usual the add-on is available for download from my GitHub repository (right click on the link and select Save as ...)
After you have installed and enabled the add-on, a new menu entry will be available in object mode: Object → Make vertex colors unique.
It might be a bit odd not to have this in vertex paint mode but it operates on more than one selected object and selecting objects is not possible in vertex paint mode so this is a bit less inconvenient.

Version 20170918 of IDMapper available on Blender Market

I have released an update version of the IDMapper add-on to Blender Market.

In the video I demo the new functionality and I have listed the release notes at the end of this article.

If you would like more information on all the functionality, have a look at this article. A complete workflow demonstration is available in this demo video.


Release notes

Version 20170918

  • Add ID Color List management
  • it is now possible to load, manage and save named lists of colors and to pick colors from this list when working in Face Paint mode. This is convenient if your studio uses smart materials for example and you have a list of predefined ID map colors you want to use for many different assets. Unlike Blender's built-in palettes, these colors have names, can be searched and sorted and loaded/saved as .csv files.
  • Add color picking outside select object in Face Paint mode
  • Number of undo levels in Face Paint mode is now configurable

Colorramp picker updated

Made a small update to the colorramppicker add-on. You can now use it on compositor colorramp nodes as well (and theorectically on any colorramp node but I didn't test it on Blender internal texture node group).
Read more on its use or watch the video in the original article.

Availability

You can download the add-on from GitHub. (click right on the Raw button and save the python file anywhere you like and then in Blender select File->User preference, Add-ons, Install from file... Don't forget to remove the old one first and don't forget to enable the add-on after installing it.)

If you would like to write add-ons yourself, you might want to take a look a my books on BlenderMarket.

New version of IDMapper available on Blender Market

I have released an update version of the IDMapper add-on to Blender Market.

In the video I demo the new functionality and I have listed the release notes at the end of this article.

If you would like more information on all the functionality, have a look at this article. A complete workflow demonstration is available in this demo video.


Release notes

Version 20170827


  • Add detection of sharp edges
  • When creating the initial ID map you now have the option to respect any edges marked as sharp as region boundaries
  • Help display in face paint mode 
  • All available keyboard shortcuts in Face Paint Mode are now shown in the lower left corner for easy reference. This can be toggled with the H-key
  • Respect sharp faces when smoothing, expanding or shrinking a region
  • When smoothing, expanding are shrinking an area in Face Paint Mode it is now possible to respect any sharp edges or uv-seams
  • Improved navigation
  • Most keys on the numpad now work as expected so panning and orbiting is now possible in Face Paint Mode
  • Bug fix: paint selected faces now sets undo stack
  • Nodeset: additional features and clean-up

    NodeSet is now also available in a Pro version. Read all about it in this article or check out my BlenderMarket shop if you are interested.

    In a reply on a previous post monari suggested some additional functionality and in the true spirit of open source even supplied a new implementation.

    So in this version I incorporated most of his new code: if you now import a texture set with an associated shader you get a height map correctly wired to a normal node with the help of a bump node.

    In addition I added the option to create a nodeset that is suitable for use with microdisplacement, i.e. that wires the height map with a multiply to the displacement socket of the material output (the option is available on the left side of the fileselector).


    The two variants of the node setup are shown below:


    As usual the add-on is available from my GitHub repository.

    Avoiding repetition artifacts with chaos mosaic

    Chaos mosaic or chaos mapping is a method to extend limited size textures to huge uv-mapped surfaces while avoiding repetition artifacts.
    You might have for example a grass covered ground texture that is detailed and would map to a 2 x 2 meter square quite well. If you would apply this to a 10 x 10 meter field and scale to its proper size, obvious repetition artifacts would be visible:

    A chaos mosaic on the other hand would take randomly selected squares from a texture giving the appearance of an endless texture without repetition:

    At close range you would still be able to make out the seams but for large objects seen from a distance this probably wouldn't be noticeable.
    This technique only gives good results for non-patterned textures like groundcover, asphalt, plaster etc. but in those cases it might be just what you are looking for and it is quite fast.
    In an older article I showed a chaos mosaic implementation in Open Shading Language but I like to work with the GPU as much as possible so I implemented the same technique in just nodes.

    Node group


    The noodle takes the uv-coordinates and then you can plug in the transformed coordinates into you texture. The scale can then be adjusted as needed. The rotation gives an additional amount of randomness to the final material but depending on the texture this might not always improve the visual quality.
    The .blend file with the node group is available from my GitGub repository. Just download the chaosmap.blend and then in your own .blend use File → Append to select the nodegroup Chaosmap. It will then become available in the Add → Group menu of the node editor.

    Improvements

    To reduce the visibility of the seams between the tiles you can mix two chaos mosaics: the second one should use slightly offset and rotated uv-coordinates and then you can use for example a noise texture with a scale comparable to the actual textures to mix the two:

    The result has less visible seams but is also somewhat blurred:

    The highlighted area shows a visible seam:


    Especially at close range:


    Some details

    You can examine the details of the nodegroup if you like but the basic principle is that it takes the original uv-coordinate, determines in which grid section this falls and then maps the relative position of the point inside this grid to a relative position inside randomly selected square in the unit uv-map. (This square is randomly selected but always the same square for the same grid section)

    Tiny Blender Addon: Snap and transform

    Enhancements available now: check the description

    I was doing some arch-viz the other day and I was placing a lot of objects in a large scene. The objects where placeholders that I created on the spot and more often than not I needed to move the origin of the new mesh object to a selected vertex for easy positioning, scaling, rotating etc.

    This is of course simple enough: select Snap cursor to selected in edit mode, switch to object mode and then select Transform → origin to 3d cursor.
    But it is also a lot of actions for a simple operation, especially if you doing this a hundred times in a scene...

    Another common scenario that I encounter is that I want to position the origin at the lowest point of a mesh. This is a little bit more involved as far as the code is concerned, a small explanation below for those who are interested in doing this on large meshes in a fast way.

    Anyway, here is a small add-on: Edit mode origin tools. It does nothing fancy, it will just create two new menu entries in edit mode:
    Mesh → Snap → Origin to selected,
    Mesh → Snap → Origin to lowest vertex (along z-axis)
    and save you some time :-)

    Code availability

    Download it from my GitHub repository (right-click on the first link and select save as ...) and in Blender go to File → User preferences → Add-ons → install from file ... (don't forget to enable it after installation. Note that the downloaded file is called snapandtransform.py while the add-on will appear as Edit mode transform tools)

    Finding the location of the lowest vertex (fast)

    If we want to get all the vertex coordinates fast, we got to switch to object mode first (line 2), get the number of vertices present (line 4) and the allocate an empty numpy array to hold all coordinates (line 7). Then we can use the foreach_get() method to get all coords (the co attribute of the verts array) in one go (line 8). It will be a flattened array so we have to reshape it to an array of 3-vectors (line 9).
     def execute(self, context):
      bpy.ops.object.editmode_toggle()
      me = context.active_object.data
      count = len(me.vertices)
      if count > 0:  # degenerate mesh, but better safe than sorry
       shape = (count, 3)
       verts = np.empty(count*3, dtype=np.float32)
       me.vertices.foreach_get('co', verts)
       verts.shape = shape
       verts2 = np.ones((count,4))
       verts2[:,:3] = verts
       M = np.array(context.active_object.matrix_world,
           dtype=np.float32)
       verts = (M @ verts2.T).T[:,:3]
       min_co = verts[np.argsort(verts[:,2])[0]]
       context.scene.cursor_location = min_co
       bpy.ops.object.origin_set(type='ORIGIN_CURSOR')
      bpy.ops.object.editmode_toggle()
      return {'FINISHED'}
    
    Now all the coordinates will be in object space so we will want to convert all of them to world space. For this we need to multiply each of them with the matrix_world of the object. This is necessary because due to rotations the lowest vertex in object space need not be the lowest vertex in world space!

    The world matrix is a 4x4 matrix (one that holds not only scale and rotation but translation as well) so we need to extend all our coordinate vectors with a fourth coordinate of 1 (lines 10,11). We also convert the matrix_world to a numpy array (line 12).

    Line 14 is then where all the magic happens: we multiply our numpy world matrix M with our array of extend coordinates using the new @ operator. (new since Python 3.5 and especially added to allow numpy code to be better readable). The double transpose is to allow matrix multiplication of a 4x4 matrix with a list of 4-vectors and transform the result back again. The fourth coordinate of the result is dropped by the [:,:3] slice index.

    Now that we have converted all coordinates to world space, all we have to do is the find the index of the coordinate with the lowest z-coordinate with argsort() and assign this to the position of the 3d-cursor before calling the origin-set() operator.

    Nodeset: bugfix and small new feature

    NodeSet is now also available in a Pro version. Read all about it in this article or check out my BlenderMarket shop if you are interested.


    The nodeset add-on I talked about in a previous article had a small bug: if your texture set was something different than a collection of .png files the extra files that should be loaded automatically were in fact not loaded. This is fixed in the latest version (201707011445)

    Code availability

    The change is already committed in the GitHub repository. (right click the link to download).

    New feature

    Because of a bug in Blender a material with a normal map node will show up as all black if you use the experimental adaptive subdivision / micro polygon displacement. If you change the normal maps space from tangent to object this does not happen so I added a user preferences setting to do this automatically.

    Converting Blender Filmic LUTs for use in Substance Painter

    with the new Filmic Blender color management options getting a lot of attention I wanted to get the exact same looks when creating textures in Substance Painter.
    Substance Painter supports LUTs in so called 3d format which are stored in .exr files. So our challenge is twofold: convert the bundled Blender Filmic LUTs to this format and of course to get results in Substance that match Blender as closely as possible.
    The results of 3 of the filmic LUTs are compared side by side in the image below:

    I made this comparison collage by keeping parameters like exposure (1) and gamma (also 1) the same in both Blender and Substance Painter and then took screenshots. I glued the screenshots together in GIMP. This way I could see all images on the same monitor. This is important because if the applied profiles are the same and both displays are sRGB, two monitors will still differ in their color response and it is fiendishly difficult to calibrate them (unless you have a very expensive monitor with the associated color calibration kit). My own monitors are not even the same brand so it is an easy trap to fall into if you compare images on two different monitors side by side.
    Anyway, even this way when you have a close look the images are close in tone but not 100% identical and I am not sure what is causing this. There might be slight differences in camera aperture, focal blur and multiple importance sampling of the environment and of course Cycles' ray model is not the same as Iray's Substance painting mode renderer. Still, I think this is pretty close and useful to compare textures in Substance under different looks before transferring them to Blender.

    How the LUTs were generated

    I used the Python bindings of the OpenColorIO and OpenImageIO libraries to create a small script (code below). These are in fact the libraries Blender uses to work with color conversions.

    The script takes a linear to linear transform that is encoded as an .exr image and creates a new .exr for each 'Look' in Blender's OCIO config file that is defined in the 'Filmic Log' process space.
    The docs for the Python bindings for both libraries are not an easy read and the APIs have some small inconsistencies so it took some time to get it working. The code is far from beautiful but i commented the relevant parts. I am open to any critique that can help to improve the transforms.
    Note that the code is not plug and play and i have no intention of improving that :-)

    The Substance LUTs

    They can be downloaded from my GitHub repository. They are bundled in one .zip file and should be unpacked before importing them in Substance Painter.

    The code

    #export LD_LIBRARY_PATH=/home/michel/ocio/lib
    #export OCIO=/home/michel/Downloads/blender-2.78-b94a433ca34-linux-glibc219-x86_64/2.78/datafiles/colormanagement/config.ocio
    #python 2.7
    #
    # run as
    # python transformlook.py
    #
    # expects linear_to_linear.exr in the current directory and will write the transform there too
    
    import OpenImageIO as OIIO  #  already installed using Ubuntu pkg manager
    from sys import path
    from array import array
    path.append('/home/michel/ocio/lib/python2.7/site-packages/')
    import PyOpenColorIO as OCIO
    
    config = OCIO.GetCurrentConfig()
    
    for look in config.getLooks():
     if look.getProcessSpace() == 'Filmic Log':
      lookname = look.getName()
      print(lookname)
    
      transform = OCIO.DisplayTransform()
      transform.setInputColorSpaceName(OCIO.Constants.ROLE_SCENE_LINEAR)
      transform.setView('Filmic')
      transform.setLooksOverrideEnabled(True)
      transform.setLooksOverride(lookname)
      transform.setDisplay('sRGB')
      processor = config.getProcessor(transform)
    
      # indentiy transform from https://support.allegorithmic.com/documentation/display/SPDOC/Color+Profile
      img = OIIO.ImageInput.open('linear_to_linear.exr')
      spec = img.spec()
      spec.set_format(OIIO.FLOAT) # for some reason this is not extracted from the image
      pixels = img.read_image()
      img.close()
    
      outfile = lookname + '.exr'
      transformedpixels = processor.applyRGB(pixels)
      imgout = OIIO.ImageOutput.create(outfile)
      ok=imgout.open(outfile, spec, OIIO.Create)
      if not ok:
       print(OIIO.geterror())
       break
      # ImageInput.read_image() returns a list of floats, and applyRGB(0 returns one too, but ImgOutput.write_image
      # expects an array of float and will die when passed a list. Bit inconsistent I think.
      a = array('d')
      a.fromlist(transformedpixels)
      imgout.write_image(a)
      imgout.close()


    Nodeset: add a principled shader

    NodeSet is now also available in a Pro version. Read all about it in this article or check out my BlenderMarket shop if you are interested.

    Even though there are better paid and free PBR nodegroups/shaders available for Blender (for example from Jeffrey Hepburn or Remington Graphics) the new Principled BSDF (a.k.a. Disney shader or PBR shader) will no doubt prove popular with Blenderheads because it is so simple to use and gives decent results.

    So I added an option to add this shader along with all the imported texture sets as well as a normal map node, basically giving you a one-click (almost) option to add a PBR material based on a set of textures from your favorite texturing tool. The new functionality is a available from Add -> Texture menu in the Node editor and sits alongside the original Set of images entry:

    The resulting node setup (after selecting a set of textures) will look like this:
    Note that this will of course only work with the new Blender 2.79 or with a recent daily build. If the Principled BSDF is not available in your version of Blender it will simply be omitted.

    Code availability

    The latest version of the code (201706251223) is available on GitHub (right click and select save as ... , then in Blender File -> user preferences ... -> Add-ons -> Install from file .... Don't forget to remove the previously installed version first!)

    A short video demo:

    Previous articles

    Previous articles about the Nodeset add-on:
    NODESET: IMPORT SUBSTANCE PAINTER TEXTURES INTO BLENDER
    NODESET: TINY UPDATE MIGHT SAVE EVEN SOME MORE TIME
    NODESET: SUPPORT FOR AMBIENT OCCLUSION MAPS
    NODESET: MORE FLEXIBILITY

    Substance Painter experiment


    Inspired by a real life flower pot in our garden but weathered quite a lot more:


    Sale: Blender Market turns 3


    There is something to celebrate: Friday June 9 Blender Market turns 3.
    To celebrate, many products will carry a 25% discount that day up til Sunday 11 (applied at checkout, and remember they are on Chicago time), including all products is my shop :-)

    How to add a progress indicator to the Info header in Blender

    There are many ways to signal progress for long running operations in Blender but the one I like best is the slider which is present when you render a scene. That kind of indicator is pretty clear and at the same time not to intrusive.


    However there seems to be no way to add such a progress indicator for other purposes.

    Now the menu bar at the top is actually the header of an area within the Info editor, so I tried to add a Panel to this header by specifying 'HEADER' for its bl_region_type. That didn't work: no errors but no visible header either.

    So after some digging around I came up with a different approach: replacing the draw() method of the Info header. After all, everything is Python and being a truly dynamic language means we can monkey patch anything.

    Basically we get the original draw() method, replace it with our own and call the original again. After this call we add a scene property to the layout of the header and use this float property to signal progress. The result looks like this:


    The relevant code looks like this:

    # update function to tag all info areas for redraw
    def update(self, context):
        areas = context.window.screen.areas
        for area in areas:
            if area.type == 'INFO':
                area.tag_redraw()
    
    # a variable where we can store the original draw funtion
    info_header_draw = lambda s,c: None
    
    def register():
        # a value between [0,100] will show the slider
        Scene.progress_indicator = FloatProperty(
                                        default=-1,
                                        subtype='PERCENTAGE',
                                        precision=1,
                                        min=-1,
                                        soft_min=0,
                                        soft_max=100,
                                        max=101,
                                        update=update)
    
        # the label in front of the slider can be configured
        Scene.progress_indicator_text = StringProperty(
                                        default="Progress",
                                        update=update)
    
        # save the original draw method of the Info header
        global info_header_draw
        info_header_draw = bpy.types.INFO_HT_header.draw
    
        # create a new draw function
        def newdraw(self, context):
            global info_header_draw
            # first call the original stuff
            info_header_draw(self, context)
            # then add the prop that acts as a progress indicator
            if (context.scene.progress_indicator >= 0 and
                context.scene.progress_indicator <= 100) :
                self.layout.separator()
                text = context.scene.progress_indicator_text
                self.layout.prop(context.scene,
                                    "progress_indicator",
                                    text=text,
                                    slider=True)
    
        # replace it
        bpy.types.INFO_HT_header.draw = newdraw
    

    The register() function defines two new scene properties: progress_indicator to hold a value in the range [0,100] which will be shown to indicate progress and progress_indicator_text to hold a configurable label. They refer to an update() function that will be called every time that the value of the property is changed. The update() function just tags any area the is an INFO editor (theoretically there could be more than one) for redraw which will cause the draw() method to be called for any of its regions, including the header region.

    Line 30 stores a reference to the original draw() method of the the Info header. Next we define a new method newdraw() that will call the original draw() method (line 36) and then add the new scene property progress_indicator but only if it has a value between zero and 100.

    The new function is then used to replace the existing draw function.

    How to use the progress indicator

    Long running operations are probably best implemented as modal operators and using the progress indicator from a modal operator is very simple. An example of such an operator is shown below (which also starts a timer that will send timer events to the modal operator. The operator will stop after 9 timer ticks and update the progress indicator on each tick. After the final tick it will set the value to 101 which will stop the progress indicator from being displayed:

    class TestProgressModal(bpy.types.Operator):
        bl_idname = 'scene.testprogressmodal'
        bl_label = 'Test Progress Modal'
        bl_options = {'REGISTER'}
    
        def modal(self, context, event):
            if event.type == 'TIMER':
                self.ticks += 1
            if self.ticks > 9:
                context.scene.progress_indicator = 101 # done
                context.window_manager.event_timer_remove(self.timer)
                return {'CANCELLED'}
    
            context.scene.progress_indicator = self.ticks*10
    
            return {'RUNNING_MODAL'}
    
        def invoke(self, context, event):
            self.ticks = 0
            context.scene.progress_indicator_text = "Heavy modal job"
            context.scene.progress_indicator = 0
            wm = context.window_manager
            self.timer = wm.event_timer_add(1.0, context.window)
            wm.modal_handler_add(self)
            return {'RUNNING_MODAL'}
    

    It is possible to update the progress indicator from a long running non-modal's execute() method as well but although the update functions associated with the scene properties will be called and hence the area tagged for redraw, an actual redraw is only initiated after the operator finishes. There is a way around with a documented but unsupported hack as shown in the code below (line 13):

    class TestProgress(bpy.types.Operator):
        bl_idname = 'scene.testprogress'
        bl_label = 'Test Progress'
        bl_options = {'REGISTER'}
    
        def execute(self, context):
            context.scene.progress_indicator_text = "Heavy job"
            context.scene.progress_indicator = 0
            for tick in range(10):
                sleep(1) # placeholder for heavy work
                context.scene.progress_indicator = tick*10
                # see https://docs.blender.org/api/current/info_gotcha.html
                bpy.ops.wm.redraw_timer(type='DRAW_WIN_SWAP', iterations=1)
    
            context.scene.progress_indicator = 101 # done
            return {"FINISHED"}
    

    Code availability

    The full code which includes the two sample operators that illustrate how to use the progress indicator is available on GitHub.

    How to remove user installed add-ons in bulk

    I admit that this is probably not a problem many people have but as an add-on developer I find myself every now an then in the situation that I want remove a whole bunch of user installed add-ons in one go.

    What I often do when I develop a collection of add-ons is define a common category for all of them that is not one of the predefined categories. That way I can at least easily find them and see them grouped together in the user preferences.

    Removing a single add-on is simple but to remove a bunch of user installed add-ons is less so because you have to locate the Blender user config directory (which is different on various operating systems) and you'll have to open each add-on file (or __init__.py file in a subdirectory if it's a multi-file add-on) to see if it defines the relevant category.

    Tedious, but fortunately Blender can help. The code below shows you how. It is not an add-on itself, it is meant to be run from the command line inside Blender or from Blender's text editor (clicking Run Script). Removing stuff always carries the risk of accidental deletion so be careful (and use this snippet at your own risk. And keep back-ups, but careful people always do that, right? ). And yes, this code removes add-ons, not just disables them!


    import bpy
    from bpy.utils import script_path_user
    from addon_utils import modules, module_bl_info
    
    import os.path
    
    userdir = script_path_user()
    
    def remove_user_installed_addons(cat='Experimental development', dry_run=True):
        for mod in modules():
            if module_bl_info(mod)['category'] == cat:
                if os.path.dirname(mod.__file__).startswith(userdir):
                    print("removing " + mod.__name__)
                    if not dry_run:
                        bpy.ops.wm.addon_remove(module=mod.__name__)
    
    remove_user_installed_addons(cat='Experimental development', dry_run=False)
    

    As you can see, Blender provides us with an addon_utils module that has both a function modules() to produce a list of all add-ons (both enabled and not-enabled)  and a function module_bl_info() that returns the bl_info block of an add-on as a dictionary.
    So all we have to do is loop over all installed modules, check if the module is part of the specified category and if so, use the script_path_user() function to determine if the directory that the add-on sits in, is in the user path (so we don't accidentally remove bundled Blender add-ons).
    If it checks out, we user the addon_remove() operator to do the actual removal.

    Blender Add-on Cookbook

    I am pleased to announce that my new book Blender Add-on Cookbook is now available on Smashwords and Blender Market
    A sample (PDF) is available to give you a small taste of what this book offers.

    A Cookbook?

    It is a cookbook for Blender add-on developers who want to go one step further and want to add a professional touch to their creations or want to add functionality that isn't so straight forward to implement.

    This book offers more than 30 examples of practical issues you may encounter when developing Blender add-ons. It gives you practical solutions with fully documented code samples, offers insight and advice based on years of developing add-ons and is fully illustrated.

    Each recipe also comes with links to relevant reference sites and Blender API sections, and each code snippet comes with a small example add-on that can be downloaded from GitHub so you can simply test the given examples.

    The book contains a proper index and is available in ePub format. (The Blender Market edition will be available in PDF and Mobi formats as well).

    E-book promotion

    Promotion!

    From one minute past midnight on March 5 Pacific time, till 11:59pm on March 11, Smashwords will host its ninth annual read an e-book week promotion. Many e-books will be heavily discounted or even free.

    I participate as well, with 50% off my e-books on Creating add-ons for Blender and Open Shading Language for Blender. They weren't expensive to begin with but still, every saving counts :-)

    If you want to get in on this deal, just click on one of the book links above and follow the instruction. During the sale a discount Coupon will be listed next to the book entry. This coupon can then be entered on check-out.

    Enjoy!

    Nodeset: more flexibility

    NodeSet is now also available in a Pro version. Read all about it in this article or check out my BlenderMarket shop if you are interested.

    Prompted by a question from Packsod 百草头 I've added the option to disable filtering the list of files. It's still enabled by default and in fact you can now specify a fragment to be used in the filter pattern.

    This means that if all your texture sets normally contain an albedo map with _alb in its name, that you not only can configure which files to load but also you can restrict the list of visible files to pick from, to anything you like. This greatly reduces the clutter when selecting a texture collection from a folder that contains many texture sets. (remember that even though you see a limited list from which you only pick one file, other textures with the same name and matching configured suffixes will still be loaded).

    This means you can configure any set of suffixes that your favorite texture editing program uses in these settings and save it along with your user preferences, an example is shown below.


    I also added the option to make suffix filtering case sensitive or insensitive. This is set to insensitive by default.

    Code availability

    The latest version of the code (201702051650) is available on GitHub (right click and select save as ... , then in Blender File -> user preferences ... -> Add-ons -> Install from file .... Don't forget to remove the previously installed version first)

    Previous articles

    Previous articles about the Nodeset add-on:
    NODESET: IMPORT SUBSTANCE PAINTER TEXTURES INTO BLENDER
    NODESET: TINY UPDATE MIGHT SAVE EVEN SOME MORE TIME
    NODESET: SUPPORT FOR AMBIENT OCCLUSION MAPS

    Add-on: Creating a chain of objects, nearest neighbor approximation

    In a previous article I started with a very naive solution to create a chain of objects that have a parent-child relation along the shortest path.

    This naive solution works but is so slow that even for 10 objects it starts getting unworkable. So the improved version uses a simplistic nearest neighbor approximation that works well with even thousands of objects. It has one drawback, you have to make sure that the active object is at one of the ends of the collection of selected objects because that is where our algorithm starts. This works quite well for artistic use, but in the future I might still try to add the Chistofides algorithm to make it more general.

    Anyway, the code is simple enough and the relevant function is shown below:

    def object_list2(objects, active=0):
     """
     Return an approximate shortest path through objects starting at the
     active index using the nearest neighbor heuristic.
     """
    
     s = time()
    
     # calculate a kd tree to quickly answer nearest neighbor queries
     kd = kdtree.KDTree(len(objects))
     for i, ob in enumerate(objects):
      kd.insert(ob.location, i)
     kd.balance()
    
     current = objects[active]
     chain = [current]  # we start at the chosen object
     added = {active}
     for i in range(1,len(objects)):  # we know how many objects to add
      # when looking for the nearest neighbor we start with two neigbors
      # (because we include the object itself in the search) and if
      # the other neigbors is not yet in the chain we add it, otherwise
      # we expand our search to a maximum of the total number of objects
      for n in range(2,len(objects)):
       neighbors = { index for _,index,_ in kd.find_n(current.location, n) }
       neighbors -= added
       if neighbors:  # strictly speaking we shoudl assert that len(neighbors) == 1
        chain.extend(objects[i] for i in neighbors)
        added |= neighbors
        break
      current = chain[-1]
    
     print("{n:d} objects {t:.1f}s".format(t=time()-s, n=len(objects)))
    
     return chain

    Code availability

    The full improved version is available on the same GitHub location. (click 'Raw' to download the Python file)

    Add-on: Creating a chain of objects

    While working on a project I came across a problem that is surprisingly hard to tackle: chaining a collection of objects along the shortest path.

    What I want for this specific example is to parent a collection of objects to each other in such a way that we have a linear chain of parent-child relations. On top of that I want this chain to be as short as possible, that is, going from parent to child along the chain of objects, I want the length of this path to be minimal.

    To illustrate what I mean, the first image shows what I am after while the second image shows a decidedly sub-optimal chain of parent-child relations:

    The problem itself is well known (finding the shortest Hamiltonian path, closely related to the Traveling Salesman problem) but unfortunately solving this problem exactly is very costly in computational terms.

    The code below shows a working but very naive implementation that I intend to use as a starting point for later improvements. It works in the sense that it finds the shortest path between a collection of selected objects and creates the chain of parent-child relations but the time to compute the solution increases more that exponentially (factorial to be precise: 8 objects will for example take 0.1 seconds, 9 objects will take nine times as much, i.e. almost 1 second and 10 objects will take ten times as much still, i.e. 10 seconds and so on). To make this remotely useful, for example to chain a necklace of 100 beads, we will have to implement some clever heuristics. That is something I intend to cover in future articles.

    Code availability

    The current code is shown in full below but the add-on as it evolves will be available on GitHub. (click 'Raw' to download the Python file)
    import bpy
    from mathutils import kdtree
    from itertools import permutations as perm
    from functools import lru_cache
    from time import time
    from math import factorial as fac
    
    bl_info = {
     "name": "Chain selected objects",
     "author": "Michel Anders (varkenvarken)",
     "version": (0, 0, 201701220957),
     "blender": (2, 78, 0),
     "location": "View3D > Object > Chain selected objects",
     "description": """Combine selected objects to a list of parent-child relations based on proximity""",
     "category": "Object"}
    
    def object_list(objects):
     """
     Return the shortest Hamiltonian path through a collection of objects.
    
     This is calculated using a brute force method that is certainly not
     intented for real life use because for example going from ten to
     eleven objects will increase the running time elevenfold and even
     with caching expensive distance calculations this quickly becomes
     completely unworkable.
    
     But this routine is intended as our baseline algorithm that is meant
     to be replaced with an approximation algorithm that is 'good enough'
     for our purposes.
     """
     @lru_cache()
     def distance_squared(a,b):
      return (objects[a].location-objects[b].location).length_squared
    
     def length_squared(chain):
      sum = 0.0
      for i in range(len(chain)-1):
       sum += distance_squared(chain[i],chain[i+1])
      return sum
    
     s = time()
    
     shortest_d2 = 1e30
     shortest_chain = None
    
     n_half = fac(len(objects))//2
     for i,chain in enumerate(perm(range(len(objects)))):
      if i >= n_half:
       break
      d2 = length_squared(chain)
      if d2 < shortest_d2:
       shortest_d2 = d2
       shortest_chain = chain
    
     print("{n:d} objects {t:.1f}s".format(t=time()-s, n=len(objects)))
    
     return [objects[i] for i in shortest_chain]
    
    class ChainSelectedObjects(bpy.types.Operator):
     bl_idname = 'object.chainselectedobjects'
     bl_label = 'Chain selected objects'
     bl_options = {'REGISTER', 'UNDO'}
    
     @classmethod
     def poll(self, context):
      return (context.mode == 'OBJECT' 
       and len(context.selected_objects) > 1)
    
     def execute(self, context):
      objects = object_list(context.selected_objects.copy())
      for ob in objects:
       ob.select = False
    
      ob = objects.pop()
      first = ob
      while objects:
       context.scene.objects.active = ob
       child = objects.pop()
       child.select = True
       bpy.ops.object.parent_set(keep_transform=True)
       child.select = False
       ob = child
      first.select = True
      context.scene.objects.active = first
      return {"FINISHED"}
    
    
    def menu_func(self, context):
     self.layout.operator(
      ChainSelectedObjects.bl_idname,
      text=ChainSelectedObjects.bl_label,
      icon='PLUGIN')
    
    
    def register():
     bpy.utils.register_module(__name__)
     bpy.types.VIEW3D_MT_object.append(menu_func)
    
    
    def unregister():
     bpy.types.VIEW3D_MT_object.remove(menu_func)
     bpy.utils.unregister_module(__name__)