Showing posts with label tree. Show all posts

NewGrowth interactive tree modeling for Blender: new version


NewGrowth, the Blender add-on that lets you interactively paint 3d trees, got a number of nice new features:

Many drawing options can now be changed while drawing

No need to choose them before you start creating a tree.
This includes the branch segment length and the kill distance. This means you can now create bushier and more sparse sections in the same tree.

Tree finalization now sports a Curve option

This will generate a curve based trunk instead of a mesh based one. This results in a superior quality trunk and is faster as well, so this is now the default. The old methods are still there and because this is all parameterized this means you can convert trees created in older versions of NewGrowth to the new curve model and back if you want.

Twig generation

You now have the option to add twigs consisting of three leaves instead of just a single leaf, which will quickly enhance the density of your tree.

Minor tweaks and bug fixes

Too many to list them all here but you now have the option to add some root and branch flare and if yo draw in rendered view instead of solid view the interactive tree is no longer all black.

The fully illustrated manual has been updated as well to reflect all the changes and the add-on is now tested on Blender 2.83 LTS


Space Tree Pro ported to Blender 2.80


Space Tree Pro, the first add-on I published on BlenderMarket way back in 2015 has been quite succesful. The add-on allows you to create parametric trees that you can keep on tweaking even after finalizing them and allows for interaction with the environment, for example grow less branches in shadowy areas and not grow into walls at all, amongst tons of other features.

Blender 2.80

As soon as Blender 2.80 was on the horizon people started asking whether a version of Space Tree Pro would be available for the new Blender. Because I have several add-ons on the market and Space Tree Pro is one of the more complex ones, it ended up last.

However, as of today Space Tree Pro 2.80 is available on my BlenderMarket shop!
Existing customers can download the new version free of charge from their BlenderMarket account.

The add-on is fully functional, including support for grease pencil drawn branches and trees created with older versions of Space Tree Pro can be used with the new version. The manual however is still a work in progress and still shows screenshots from the older version. The functionality is the same though so that shouldn't be too much of an issue.

Remarks

While porting I found a bug: a shadow collection (group) only seems to work correctly when you have also configured an exclusion collection (group). I think I can fix this but I am reluctant to do so as it might break backward compatibility so I am hoping for some feedback on this from users.

People looking for a more interactive way of drawing trees might want to have a look at NewGrowth: draw trees interactively.

newgrowth exclusion zone (new feature and price drop)

A new exclusion zone has been added to the NewGrowth add-on.

This add-on allows you to design trees in Blender interactively.

And just for fun I lowered the price to just under 30$ Check it out on my BlenderMarket shop while this offer lasts!


NewGrowth Interactive tree design, Blender 2.80 edition

Today I am happy to announce the Blender 2.80 edition of my NewGrowth add-on.

The add-on allows you to design trees interactively and later even adjust some parameters of the generated tree mesh.

An introduction and a feature overview are avaliable in the next two videos (still showing the 2.79 user interface)

The add-on is available on BlenderMarket.

NewGrowth Interactive Trees, detailed feature overview


In a previous post I introduced NewGrowth, a new add-on to draw trees interactively.

In this video a more detailed overview is presented of the features that are available in NewGrowth.
NewGrowth is available in my BlenderMarket store.

NewGrowth Interactive Trees

Finally, after more than five months of work I am pleased to present NewGrowth, my new interactive tree drawing add-on for Blender.

This add-on allows you to draw natural trees by painting imaginary light points with a brush towards which branches will grow. This may sound a bit magical so an introduction video might explain more than words:
NewGrowth is available from my BlenderMarket shop.

Realistic trees in the middle distance

The goal of this article is to document as well as possible what is needed to create realistic trees in de middle distance while using as few rendertime resources as possible.
In a previous article we found that using geometry instead of alpha mapped leaves might be faster to render and in this article we investigate this further and investigate geometry and material choices that allow for realistic trees while minimizing render time and memory consumption.

Realism and middle distance defined

What do we consider to be the 'middle distance'? We are not dealing with image filling close-ups of hero trees but we need more details than a back-plate depicting trees at hundreds of meters away.
For trees I consider the middle distance a distance where we still can see that the tree consists of individual leaves and that when moving we are close enough to see a parallax effect (we see different sides of the tree and perceive it as truly three dimensional.
To achieve realism at this distance then, it is necessary for the tree to be a three dimensional mesh with actual 3D branches in its crown. Also we will still be able to discern the outline of individual leaves (but not very clearly) but surface detail in leaves will not make perceptible difference and neither will small details in the bark texture.
In the sections below I will illustrate the choices I made as I recreate a medium sized red oak (quercus robur) from scratch while keeping this image as a reference.

To create the tree mesh I use my Space Tree Pro add-on but the observations apply to any tree mesh of course.

The reference

The reference photo was shot in fairly light conditions in the afternoon in the spring (May). The tree in question is about 8 meters high and has new spring leaves that are (almost) fully grown. These leaves are individually about 10-12 cm long and all fairly even in color because there is almost no insect, mold or wind damage yet.

We will try to emulate the direction and intensity of the light in the original with a suitable HDRi from HDRI Haven and use filmic color management to approximate these fairly high contrast conditions.
Note that the trunk of this tree is a bit obscured by a metal trellis to guard against damage by goats ;-)
A closeup of the bark shows a fairly uniform grayish texture with comparatively few deeper structures (the tree is about 14 years old).

The camera was at roughly 20-25 meters from the tree.

The crown shape

Most trees have a crown shape that is not a perfect sphere and an oak is no exception. The shape is an egg shape, wider at the bottom than at the top. The crown silhouette is not perfectly smooth still, some bumps and dents are noticeable.
In more mature oak trees these irregularities will result in a more cumulus cloud-like silhouette. Even though the branches themselves are hardly visible due to the leaves, from winter photos we know they have a slightly upward bending habit and are not straight. Note that we do not model every little twig; our leaf particles will be modeled to resemble twigs and not just single leaves.

Foliage density

It is a little bit difficult to find information on the actual number of leaves on a tree of a certain age so we will do this 'by eye'. There are no leaves deep inside the crown but red oaks do not have leaves just at the end of the branches but twigs with leaves are also present deeper into the crown along the branches.

Twigs instead of individual leaves

Leaves are typically connected to small twigs so instead of bunching up all the leaves at points along the branches we create particles with multiple leaves like shown below. Note that at this point we don't bother with the actual shape: the leaves are rectangular and we leave out the actual twig altogether.

Leaf shape

We notice from the initial rendering that at a camera distance of 25m we can see even at this resolution that the leaves are rectangular, so we need to shape these leaves a little bit more.

Geometry vs. alpha mapping

Since we cannot see small details, leaf texture maps are not necessary: instanced geometry is very efficiently rendered, and also real geometry gives us the option to add a real crease and some curvature to the leaves. The final shape we choose is shown in the image below. We create some variations that we place in a group that we can use in a particle system. Remember to use smooth shading on the meshes otherwise you will get sharp reflection boundaries which will give a noisy impression

Leaf material

The leaf material is important but because we cannot see any small details at this distance it will not be necessary to use texture maps, so we will create a simple shader that uses Blender's principled shader node.

Color and roughness

Color and roughness are very important for the look and feel. Because all the leaves on our tree are fresh the color is rather uniform. The leaves are also smooth but not very shiny. The first approximation looks like this:

Variation

Even if we are looking at fairly uniform spring foliage, for visual interest or to get a more summer-like look we might want to add some variation. Because each particle is an object with a unique random number we can use a simple color ramp to drive this color variation. Because each particle has more than one leaf, we give each leaf a unique gray-scale vertex color as well for even more variation.

The node setup we use and the result look like this:


Note that the front and backsides of the leaves are slightly different in real life but we ignore that.

Translucency

If we look at the image now we notice that the coloring is still rather flat, even though the contrast is quite high and we added a bit of color and roughness variation. The main reason for this is that the leaves at the outside receive a lot of light from behind and are a bit translucent. If we add a small fraction of translucency, the whole crown gets a far more dynamic coloring:


Transparency

Translucency implies some transparency as well: the light that is travelling through a leaf and gets through will end up illuminating something else. Transparency will result in longer render times however so we will want to use as few bounces as possible. We use the same noodle as before but add 0.1 transparency in the principled shader:


(Images show 0, 1, 2 and 3 bounces respectively: the difference is hardly noticeable if we add some transparency and more than one bounce is indistinguishable to the human eye)
So we see that transparency is desirable for slightly more light deeper inside the crown but the effect of more than one bounce is limited]

Bark material

With the leaves covered we also need to look at the bark.

Color, roughness and normals

The bark is only really visible on the main trunk. Some color variation is visible at this distance but not much and the bark structure is invisble.

Displacement

The outline of the trunk looks rather smooth and artificial so it will benefit from some extra distortion and even though still experimental in 2.79, micro-displacement is an efficient way to add details to a low poly mesh and break the artificially smooth outline of the trunk. The settings used are the defaults (modifier on the left, material settings on the right):


The shader we use looks like this

Note that we scale everything with the distance to the origin of the mesh [which is at the foot of the trunk), this way small branches will get almost no visible displacement while the foot of the trunk even flares out a little bit, hinting at some hidden root system

Render times

Each effect that we add impacts render times so here is a small summary, all rendered at a resolution of 700x750 pixels at 500 samples with denoising on a GTX970 (the absolute timings will be different on different hardware of course):

Material effects


Featuretime (seconds)
3 transparent bounces174
2 transparent bounces172
1 transparent bounces164
no transparency156
no translucency144

The timings were generated by simply muting the relevant nodes in the material or setting transparent to 0 in the principled shader. Cycles is smart enough to optimize away any unused nodes in the resulting shader.
Since transparency adds quite a bit to the render time, we might skip it all together because as we have seen it is hardly visible in the end result. The 10 extra seconds for translucency however are certainly worth it.

Leaf geometry

We already know that real geometry is faster than using alpha mapped textures, but what about more particles or more detailed geometry? In the images shown until now we each time had 14868 leaves on the tree, each leaf with 448 square faces. If we vary these numbers by changing the number of particles and subdividing the faces in the leaves, we can compare the render times.
number of particles /
number of faces in leaf
100001486820000
448 (1x)154174190
1792 (4x)162183204
7168 (16x)170194226

As we can see, doubling the number of particles does not double the render time. So if we need to create a denser tree crown, adding a few particles does hurt much.
This is even more true for the amount of detail in the leaves: 16 times the number of faces only amounts to approximately 10% extra render time.
The impact on peak memory usage during rendering is minimal: at 7168 faces per particle, 10000 particles peak at 647 MB, and 20000 particles at 651 MB, so with the number of particles we need for a tree the memory usage is hardly a concern.

Conclusion

With our choice of a single transparent bounce but with added translucency we get a nice result. Adding some extra particles or refining the geometry of the leaves does not hurt render times much but there is no need to go overboard as a few extra faces go a long way. No doubt that the realism of the image can be improved even more by proper lighting etc, but I am not an artist so i concentrated on the technical aspects :-)

Freebie

If you like the tree and/or want to experiment with it, you can download the .blend file from my GitHub page. The tree was generated with Space Tree Pro [available on BlenderMarket], so if you own that add-on you can even change its parameters to get different oak trees (the tree parameters are not compatible with my old free space tree add-on)

free Blender model of a red maple

As something different from all the coding I'd like to present you a freebie model of a small red maple (Acer rubrum, wikipedia)

The tree was created with my Space Tree Pro add-on (available on Blender Market). It can be used as is or (if you have the Space Tree Pro add-on) tweaked to your liking.

The tree

The tree is a generated mesh object called Tree and has a particle emitter parented to it. So if you move it make sure you move the tree mesh and not just its particles (called LeafEmitter). The materials used for the leaves can be tweaked to give an even redder appearance if you like, but I chose to tone it down a bit towards slightly more late autummn orange/yellow.

The shape of the tree crown was modeled (roughly) on the 'Autumn Glory Maple' (Red maple, Acer Rubrum) (see e.g. https://goo.gl/images/DUAFw4 ) and the leaves were taken from a photographic reference (see below) and most likely from a north American red maple. The bark material is a simple procedural material.

If you render the scene be aware that the bark material uses the experimental micro displacement settings and is set to GPU. So depending on your system you might not see all surface detail in the trunk that you see in the sample rendering and micro displacement is heavy on RAM so you might need to use your CPU to render anyway.

Availability

The .blend file is available for download from GitHub (right click and save as ...). It is fairly large (76MB) because of the packed image files and because the tree mesh and the leaf particle system add up to about 240k tris. It is distributed under a CC BY-SA 4.0 license.

Additional credits

Even though these individuals provided material under a CC0 license, I really appreciate their efforts so I would like to point you to their respective web pages.

The environment HDR used in the scene is from HDRI Haven (https://hdrihaven.com/) by Greg Zaal. Specifically the low res version of the river walk. It was used without changes in this scene. Greg's HDRIs are free (CC0) but you can support his work on Patreon

The original leaf images are from Dustytoes on Pixabay They were also provided under a CC0 license and already isolated from the background. You might want to give her a thumbs up. I created 7 individual textures from the original and converted them to PBR texture maps using Substance Designer's Bitmap to material node.

Calculating the number of connections in a tree, or why numpy is awesome but a good algorithm even more so

the issue

imagine you are creating trees, either pure data structures or ones that try to mimic real trees, and that you are interested in the number of connected branch segments. How would you calculate these numbers for each node in the tree?
If we have a small tree like the one in the illustration, where we have placed the node index inside each sphere, we might store for each node the index of its parent, like in the list: p = [ -1, 0, 1, 2, 2, 4 ]Note that node number 0 has -1 as the index of its parent to indicate it has no parent because it is the root node. Also node 3 and 4 have the same parent node because they represent a fork in a branch.

naive solution

to calculate the number of connected nodes for each node in the tree we could simply iterate over all the nodes and traverse the list of parent nodes until we reach the root node, all the while adding 1 to the number of connections. This might look like this (the numbers are profiling information)
      hits       time      t/hit

      7385       4037      0.5   for p in parents:
    683441    1627791      2.4    while p >= 0:
    676057     410569      0.6     connections[p] += 1
    676057     351262      0.5     p = parents[p]
The result has the following values c = [5, 4, 3, 0, 1, 0]The tips have no connections while the root counts all nodes as connections minus itself so our 6-node tree had a root with 5 connections. This is also illustrated in the illustration (on the right).
If we time this simple algorithm for a moderately sized tree of just over 7000 nodes (which might look like the one in the image below to get a sense of the complexity) I find that it takes about 1.16 seconds on my machine.

numpy implementation

Now we all know that numpy is good at working with large arrays of numbers (and conveniently already bundled with Blender) so we might try some simple changes. Almost identical code but with numpy arrays instead of python lists:
      hits       time      t/hit

      7385       4563     0.6   for p in self.parent[:self.nverts]:
    683441    1695443     2.5    while p >= 0:
    676057    2004637     3.0     self.connections[p] += 1
    676057     456995     0.7     p = self.parent[p] 
But in fact this is slower! ( 2.68 seconds on my machine) If we look at the timings from the excellent kernprof line profiler (the numbers on the left of the code snippets) we see that numpy spends an awful lot of time on both the iteration over the parents and especially the indexing of the connection array. Apparently indexing a single element in a numpy array is slower than the equivalent operation on a python list. (There is a good explanation why indexing a single element of a numpy array takes so long on StackOverflow.)

reworking the algorithm

It must be possible to do this faster right? Yes it is, have a look at the following code:
      hits       time      t/hit

         1           2      2.0   p = self.parent[:self.nverts]
         1          19     19.0   p = p[p>=0]
       137          97      0.7   while len(p):
       136        1684     12.4    c = np.bincount(p)
       136        1013      7.4    self.connections[:len(c)] += c
       136        3395     25.0    p = self.parent[p]
       136        1547     11.4    p = p[p>=0]
This produces the same result (trust me, i'll explain in a minute), yet uses only milliseconds (7 to be precise). The trick is to use as much numpy code with looping and indexing built in as possible: bincount() counts the number of occurrences of a number and stores it the corresponding bin. So if 3 nodes have node 0 as their parent, c[0] will be 3. Next we add this list in one go to the cumulative number of connections and finally we get the parent indices also in a single statement and remove the -1 entries (those nodes that reached root in their tree traversal). We repeat this as long as there are nodes that have not yet reached root.

conclusion

Numpy might often be faster than pure Python but it pays to check, using careful profiling. Using an appropriate algorithm that does away as much as possible with any python overhead might however give you a sizeable speed improvement although the algorithm might not be immediately obvious to find.

Space tree pro

This bit of research is not just academical, I am currently investigating options to speed up tree generation as implemented in my Space Tree Pro Blender add-on (available on BlenderMarket)


Further Space Tree Pro animation experiments

The trees you create may look alright but they are fairly static. To add realism animated leaves and a swaying trunk skeleton might help.

Therefore I am currently investigating which simple animation techniques could be used. The goal here is to add some life to scenes like architectural fly through, so low wind scenarios is what we aim for.

The general idea is to animate the trunk and branches (and the separate mesh that acts as a leaf emitter) by an armature consisting of just a few bones. The leaves are subsequently animated by adding an extra wave modifier to the leaf emitter that moves the point where a leaf is attached slightly. Additionally we animate the phase of the rotation of the leaf particles slightly.

The overall effect should be a slight swaying motion with some additional movement of the individual leaves. The first result is shown below

i think it would look better with more movement for the individual leaves.

Now the swaying movement itself is still a bit much: larger trees actually need quite some wind before the main trunk starts to move, the outer branches however are much more flexible and bend in low winds for all sizes of trees.

This seems to be be the right balance between sway and leaf movement.

When these experiments are finalised the idea is to add an option to Space Tree Pro to enable all these modifiers and additional settings by simply checking a box. And of course we'll make sure that each tree will get slightly different values so that an animated street full of trees will look as if it is performing some weird choreography.

Blender Conference Discount


During the 2015 Blender Conference (from 23 to 25 October) many products at BlenderMarket will come with a 20% discount. Of course I will participate in that sale as well, so if you were thinking about purchasing either WeightLifter or Space Tree Pro, now is your chance to get an even better deal :-)

Now I wouldn't want to exclude my Open Shading Language for Blender E-book from the fun so even though it is not marketed by BlenderMarket it will carry the same 20% discount during the Blender conference. Get it on Smashwords and enter the coupon code EY53W on checkout.

Space Tree Pro: new features

I have updated my Space Tree Pro add-on for Blender. Its latest version (201510041334) comes with additional skinning modes, and option to add some random bumps to the basic crown shape and and option to randomly drop some mature branches from a tree to add 'character'. The new update is of course free to download for people who have previously purchased the Space Tree Pro add-on.

Better skinning

The native skinning option in the add-on left something to be desired, especially for thinner, highly curved branches which may end up looking rather squashed. This new version therefore sports three additional skinning modes, each with it own pros and cons:
Native
The original modifier. An example of the flattened twigs is shown in the image:
Skin modifier
It is now possible to use Blenders built-in skin modifier. It looks better but is really slow:
Convert to curve
Another choice is converting the tree skeleton to a collection of bevelled curves:
Ball and pipe
The final option is to use the conventional ball and pipe approach:
The quality of the new methods is comparable but the time to generate the mesh and and the number of polygons in the mesh differs significantly: For a moderate tree (1000 markers, 400 new markers, branch segment length 0.25, kill distance 1.0) the four skinning methods give the following numbers (on a Intel i7, 4 cores, your mileage may vary)
MethodTime (seconds)Tris
Native1.573,886
Convert to curve1.263,536
Skin modifier35.8415,092
Ball and pipe1.6141,376

A more random crown

It was already possible to vary the branch generation by choosing a different random seed but the overall shape of the crown stayed the same unless you used a crown group. Now with the added bumpiness and size variation for the basic crown shape it has become much simpler to generate unique trees. Compare the three different trees on the top row (diffent branching, same overall shape) with the three trees on the bottom row (which have random bumpiness and shape).

Dropping some mature branches

The final new addition to this version is the option to break away a random number of branch segments after the tree is fully generated. This may add some character to trees think storms etc.). The image below show the same trees where the one on the right has 50 segments removed:

Space Tree Pro: new features WIP

My Space Tree Pro add-on for Blender is doing quite well. However, any piece of software needs contineous attention and that is what I am giving it at the moment.

The features I am working on right now need some internal testing before I release them but you can expect them in a few weeks or so. The main focus is on the quality of the tree mesh. The algorithm I use now is pretty fast but the results are not optimal, especially for thin branches connected to thicker ones and for highly curved branches.

The improvements in the works are threefold:

  • Crease the branch forks. This gives a tighter look for small branches connected to thick stems with a negliable impact on speed,
  • An option to use Blenders skin modifier. Looks great but is much slower (5-10x),
  • An option to convert the skeleton to a beveled curve (a la Sapling). Is actually faster and although thin branches look better, the branch forks are somewhat inferior to the skin modifier
The last two options look a lot cleaner but there's no control of the uv-map, which means procedural or box-mapped textures only. (images will follow)

Space Tree Pro: Hazel tree freebie

The hazel tree that was used in the promotional image I created for this article is now available for free. You can download it from here. The materials are Cycles ready.

It serves as an example of what can be created with my Space Tree Pro add-on for Blender (available on Blender Market). It can be used as is or (if you have the Space Tree Pro add-on) as a starting point for other trees. (It has all the Space Tree Pro settings stored as object attributes, which will be recognized by the add-on)

Space Tree Pro,another showcase

Currently I am working on a next release of my Space Tree Pro addon. This picture shows off the ease of adding trees to provide a suitable backdrop. It also shows off the new hazel tree example. The next release will probably be available around the end of august.

Currently I am working on a next release of my Space Tree Pro addon. One of the things it will feature is randomization of the basic ellipsoid crown shape and some additional bundled tree examples. The one shown below is has photo realistic hazel leaves and has is crown slightly randomized.

I know of course that hazel trees or bushes normaly don't grow in a prairie like environment :-)

Features that will probably make it into the next release:

  • Randomized crown outline
  • Randomzied shape, offset and distortion of the crown shape, making it easier to create unique but similar trees
  • A better looking trunk mesh
  • The possibility to remove random branches, adding character to trees
  • Several new, ready to use example trees
This new revision will of course be free of charge for people who already bought the addon.

Pro-Lighting: Skies Demo

I am working on some additional sample trees for my Space Tree Pro add-on and one of the things I really wanted is some easy yet professional lighting setup and guess what, out of the blue comes BlenderGuru with a very handy addon :-) It works really well and makes cycling between different HDRi setups pretty simple. just a sample from a WIP promo piece:

Space Tree Pro pine tree WIP

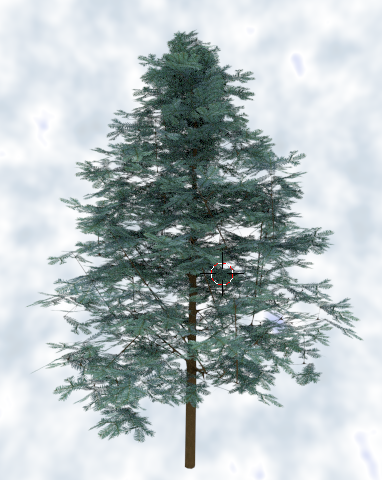
Yes it is possible, you can create pine trees with Space Tree Pro as well:

The relevant settings are shown below.
The trick is in the Straight Weight setting and the tapering (the Shape parameter). And of course a particle system based on scanned twigs. For now it's just a single twig based on an image from wikipedia but I will scan soem more form the trees in our backyard (because even if it is cc0 I only want to distribute my original work ).

The branch distribution is not optimal in the sense that real pine trees hardly have any branches that point upward but ill try to tweak it some more.
Space Tree Pro is available on Blender Market.

Scenic view made with Space Tree Pro

Just another image to promote my new addon Space Tree Pro.

Sunset

I am working on some additional images to promote my new addon Space Tree Pro and although primarily intended for trees in the middle distance you can create hero trees as well.
The tree was created by distributing a group of icospheres to shape the crown and the rock and the wall are part of an exclusion group, so growing branches did not penetrate them. All branches drop a bit below the volume set by the icospheres because of tropism. The scene looks like this: